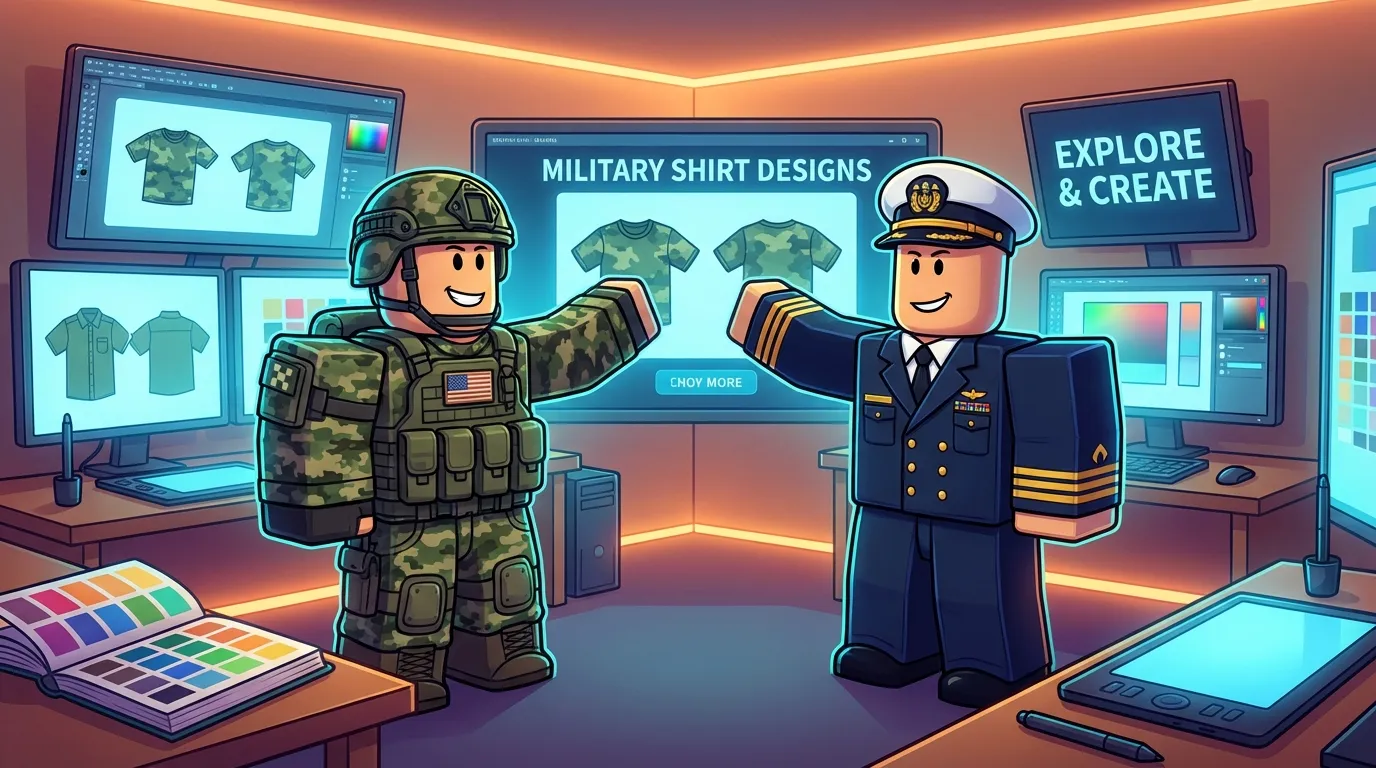
Roblox Military Shirt Templates Guide
Roblox military shirt templates are pre-designed PNG files that help you create military-themed uniforms for Roblox avatars. These templates ensure your designs fit correctly, adhere to Roblox's technical standards, and avoid common issues like misaligned graphics. They include clear markers for placing camo patterns, insignias, and other details.
To get started, you’ll need:
- The official Roblox shirt template: A 1024x1024 PNG file available in Roblox developer resources.
- Design tools: Options include Photoshop, GIMP, Paint.NET, or the web-based Alive Games for Skins, which preloads templates and simplifies the process.
- Visual resources: Use free camouflage patterns, rank insignias, and gear textures for realistic designs.
Steps to create military shirts:
- Set up the template and add design elements like collars, pockets, and camo textures.
- Place insignias and patches accurately using the template's guidelines.
- Add shading, stitching details, and fabric textures for depth.
- Export the design in PNG format and upload it to Roblox, ensuring it meets platform requirements.
To make your designs stand out, focus on accurate details, muted colors, and proper placement of insignias. Avoid using copyrighted logos or symbols to comply with Roblox's rules.
Alive Games for Skins simplifies the process by offering a free, web-based editor with preloaded templates and export options. Whether you're designing for fun or creating items to sell, following these steps ensures your military shirts look professional and fit Roblox avatars perfectly.
[ROBLOX TAILORING] How to make roblox clothes (especially military unis)
Required Tools and Resources
Designing military-themed Roblox shirts takes a combination of templates, design tools, and visual resources. Having everything ready before you dive in can save time and help you create designs that look polished and professional.
Official Roblox Shirt Template
The official Roblox shirt template is a PNG file with specific dimensions, serving as the backbone for any custom shirt design. This template ensures your military-themed shirt fits Roblox avatars properly and complies with the platform's guidelines.
You can find the template in Roblox's developer resources. Some design tools, like Alive Games for Skins, make things easier by preloading the template directly into their editor.
The template is divided into sections for the front, back, and sleeves of the shirt. Pay attention to these zones - details like rank insignia, patches, and tactical elements should be placed in the correct areas to maintain proper proportions for a military look. Once you’re familiar with the layout, it’s time to pick the right design tools.
Design Tools and Software
After grabbing the official template, the next step is choosing a design tool that fits your needs. Popular options like Adobe Photoshop, GIMP, and Paint.NET offer powerful editing features but require you to download and set up the template manually.
Alternatively, Alive Games for Skins simplifies the process by preloading the Roblox template and handling technical settings for you. This free, web-based tool is designed specifically for creating Roblox shirt templates, eliminating the need to install software.
"Alive Studio is our free online tool that allows you to create and customize your own Roblox shirt templates without the need to download any software."
Alive™ For Roblox This tool is especially helpful for military designs, where accuracy is key. Whether you're crafting a single uniform or designing an entire set for a military-themed game, Alive Games for Skins supports both individual creators and game studios. Currently in Closed Beta, access requires joining their waitlist.
Free Resources for Realistic Details
The secret to making your military designs stand out lies in the details. Access to high-quality visual resources can take your shirts to the next level. While there isn’t a universal library of free military assets, you can find camouflage patterns, rank insignia, unit patches, and gear textures across various online communities and resource sites.
For camouflage, consider patterns like woodland, desert, urban, or digital camo that are seamlessly tileable. Properly placing historically accurate insignia and ensuring correct sizing based on real military standards will add authenticity.
To make your designs more lifelike, use shading overlays and weathering textures. Subtle dirt marks, fabric wear, and lighting effects can give your shirts a rugged, battle-tested appearance. These details help transform a flat design into something that feels real.
When gathering resources, always check licensing to ensure you’re allowed to use them for your Roblox creations. Many online communities focused on gaming or digital art share free resources, making them great places to build your asset library.
How to Create Military-Themed Shirts Step by Step
Designing a military-themed shirt involves setting up a template, adding design elements, and refining the final details to achieve a polished look.
Setting Up the Template
Start by downloading the template from this link and open it in your editor. Ensure the canvas is set to 1024x1024 with all layers visible. The template clearly outlines sections for the front, back, and sleeves, which helps ensure a proper fit for avatars.
If you're using Alive Games for Skins, the template is preloaded automatically. This means you can dive right into designing without needing to download or adjust anything.
Once the template is ready, you can begin incorporating your military design elements.
Creating the Shirt Design
Start by focusing on key military details like collars, sleeves, pockets, and epaulets. These foundational elements establish the overall military aesthetic before adding patterns or insignia.
Next, overlay a camouflage texture on a new layer. Choose a pattern that fits your theme, such as digital, woodland, or desert camo. Use the template guidelines to position insignia and other details accurately. Adjust the opacity and blending modes of the camo layer to create a balanced, realistic effect that complements the other design elements.
When adding insignia, precision is crucial. Use selection tools to apply colors and place insignia correctly based on the template. For example, rank insignia often appear on collar points or shoulder boards, while unit patches are typically positioned on the upper sleeves. Ensuring accurate placement and color can significantly enhance the authenticity of your design.
With the main design in place, move on to adding textures and shading for a more polished look.
Adding Textures and Final Details
Once the core elements are complete, refine your design with realistic textures and shading. Use a soft brush at reduced opacity to add shadows in natural areas like under collars, along sleeve creases, and around pocket edges. This subtle shading adds depth and dimension to your design.
For fabric texture, overlay a light textile pattern and adjust its opacity so it blends seamlessly with the base design. Tools like free shadow templates, available on the Roblox Developer Forum, can help you achieve professional results more efficiently.
Don’t forget stitching details - they’re small but impactful. Use the line tool with a dashed or dotted style to create thread-like lines along seams, pocket edges, and other natural stitching areas. Opt for a color slightly darker than the base fabric to make these details stand out without being too bold.
Always work in high resolution to preserve clarity, especially for fine details like insignia or stitching. Only downscale your design when you're ready to export it. Before uploading, test your shirt in Roblox Studio to ensure everything aligns correctly and looks as intended on avatars. This final check can help you avoid errors and ensure your design is ready to shine in-game.
Exporting and Uploading Your Design
Once your design is complete, it’s time to prepare it for Roblox. The export process is just as important as the creation phase, so make sure every detail is accurate and polished.
Exporting Your Design
Export your design at 1024x1024 pixels in PNG format. Before exporting, flatten all layers, remove any guidelines, and give the file a clear, descriptive name like "US_Army_Camo_v2.png". A good naming system makes it easier to organize multiple designs and track updates.
"Alive Studio is our free online tool that allows you to create and customize your own Roblox shirt templates without the need to download any software."
Alive™ For Roblox Tools like Alive Games for Skins simplify this process by letting you export directly to Roblox-compatible PNG files. This web-based editor takes care of resizing and format conversion, so you can export your design with a single click.
Before finalizing, preview your design at full resolution. Check for any pixelation or visual artifacts, especially in detailed areas like insignia or stitching. These small elements can lose sharpness during export if not handled carefully.
Once your PNG file is ready, you’re set to upload it to Roblox.
Uploading to Roblox
Log in to your Roblox account and navigate to your avatar’s upload section. Select your avatar, click on the 'Shirts' tab, and upload your exported PNG file. Wait for the platform to process the file.
Use Roblox’s avatar preview feature to see how your design looks on various body types. This step ensures your military shirt fits properly and appears as intended across different avatar shapes and sizes.
Make sure your file meets Roblox’s technical requirements - 1024x1024 pixels in PNG format - to avoid upload errors. If you encounter an issue, double-check these specs first.
Keep in mind that Roblox’s Community Standards prohibit designs with copyrighted logos, offensive imagery, or realistic depictions of violence. Stick to generic military designs rather than specific unit insignias or controversial symbols. All uploads are reviewed by moderators, and non-compliant designs may be rejected.
Once your shirt passes the upload and preview checks, decide whether to keep it private or make it available for purchase. And don’t forget to save a backup copy of your original design file for future tweaks or updates.
Best Practices for Military Shirt Designs
Once your design is ready, there are a few key steps to ensure it feels authentic and meets Roblox’s guidelines. Crafting military-themed shirts that look polished and professional requires attention to detail and an understanding of both military aesthetics and Roblox's community standards. Here’s how to strike the right balance.
Guidelines for Realistic Designs
Study real military uniforms for accuracy. Look at authentic references from different branches and time periods. Pay close attention to details like pocket placement, seam lines, and insignia locations. Stick to muted, practical colors - military uniforms rarely feature anything bright or overly eye-catching.
Incorporate shading and texture for depth. Adding soft shading around seams and folds can make your design feel more lifelike. Free shading templates from the Roblox Developer Forum can help here. Play with opacity and blending modes to keep the effect subtle and natural.
Create realistic camouflage patterns. Layer different tones to build a natural-looking camo without making it overly symmetrical or repetitive. Research styles like woodland, desert, or digital camouflage to understand their visual principles, but avoid directly copying them.
Position insignia and patches thoughtfully. Place these elements where they would naturally appear on real uniforms. Keep them proportional to the shirt’s overall size, and ensure they remain clear even at Roblox’s resolution.
Avoid common pitfalls like low-resolution textures, misaligned insignia, or overly bright colors. Test your design in Roblox to check for stretching or placement issues before finalizing it. These small steps can make a big difference in the overall quality of your work.
Following Roblox Rules
Familiarize yourself with Roblox’s content policies. Roblox prohibits clothing with inappropriate or copyrighted content. This means you should avoid using real military logos, specific unit patches, or national symbols unless they’re significantly altered.
Design original or stylized military elements. Instead of replicating real-world insignia, create generic rank symbols, unit patches, and service badges. This approach captures the military vibe while staying within Roblox’s guidelines.
Steer clear of designs suggesting violence or political bias. Opt for neutral color schemes, basic rank structures, and standard camouflage patterns to avoid potential issues.
Double-check alignment and compliance in Roblox. Review the platform’s Community Standards and Clothing Guidelines to ensure your design meets all requirements. Testing your design on avatars and sharing prototypes with friends or groups can help you gather feedback on both realism and compliance.
The best military shirt designs combine well-executed camouflage, clear insignia, and realistic shading that mimics fabric textures. They avoid unnecessary clutter, maintain cohesive color schemes, and fit seamlessly on Roblox avatars, appealing to players who enjoy military roleplay.
Document your workflow for future use. Keeping track of your design process can make revisions or moderation appeals easier. Tools like Alive Games for Skins offer templates and export options to simplify your workflow while ensuring your designs meet technical standards.
Conclusion
Creating military-themed Roblox shirts becomes a straightforward process when you follow the steps outlined in this guide. Start with the correct template, use reliable tools, and focus on accurate details like shading and placing insignias properly.
Alive Games for Skins makes this even easier with their intuitive web-based editor that takes care of the technical side for you.
"Alive Studio is our free online tool that allows you to create and customize your own Roblox shirt templates without the need to download any software."
This tool lets you dive straight into the creative aspects without worrying about setup or compatibility.
Experimentation is the key to designing standout military shirts. Play around with camouflage patterns, adjust color schemes, and fine-tune insignia placement. With the web-based editor, you can quickly test your ideas and see how they look on Roblox avatars before committing to a final upload. This trial-and-error process often leads to designs that truly connect with the Roblox community.
Great designs strike a balance between realism and creativity. Use real-world military uniforms as inspiration, but don’t shy away from adding personal, stylized touches that set your work apart. Start with simple designs and gradually take on more complex projects as your skills improve. This approach ensures your designs are not only technically sound but also visually appealing.
Whether you’re creating for fun or planning to sell your designs, the techniques in this guide provide everything you need to produce high-quality results. With these tools and tips, anyone - regardless of experience - can craft military-themed shirts that stand out.
The Roblox community appreciates well-made designs that respect platform rules and capture the essence of military aesthetics. Accurate camo, well-placed insignias, and thoughtful color choices help your creations shine. By following this guide, your designs will meet these expectations while staying true to the principles of authenticity and creativity.
FAQs
How can I make sure my military-themed Roblox shirt design follows Roblox's Community Standards?
When designing a military-themed shirt for Roblox, it's important to keep it suitable for all ages and in line with Roblox's Community Standards. Focus on general military-inspired elements like camouflage patterns, generic badges, or insignias. Avoid using any real-world political or military symbols, as these could be seen as inappropriate or controversial.
Before uploading your creation, take a moment to review Roblox's Community Standards, especially the sections related to user-generated content. This ensures your design aligns with their rules and reduces the risk of it being flagged or removed.
How can I create realistic camouflage patterns for Roblox military shirts?
To design realistic camouflage patterns for Roblox military shirts, start by examining actual military uniforms. This will help you grasp the typical color palettes and patterns used in different environments. Focus on shades like green, brown, gray, and black to replicate settings such as forests or deserts. While creating the pattern, layer irregular shapes of varying sizes to create a natural, blended effect.
For a more lifelike touch, try adding texture overlays to mimic the appearance of real fabric. If you're using a tool like Alive Games, make the most of its customizable templates and built-in design features to simplify your workflow. Once your design is complete, ensure it's exported in the correct format for Roblox to guarantee a smooth upload process.
How does Alive Games make it easier to design and export Roblox military shirt templates?
Alive Games provides a straightforward, web-based tool designed to make creating Roblox shirt templates a breeze. Its easy-to-use editor allows you to craft intricate and polished designs, including military-themed shirts, all without needing any extra software.
The platform also features hassle-free exporting, letting you effortlessly transfer your custom designs directly to Roblox or other supported formats. This efficient workflow not only saves time but also guarantees top-notch results for your creations.