Roblox Texture Optimization: Best Practices
Optimizing textures in Roblox is all about balancing visual quality and game performance. Poorly optimized textures can cause lag, crashes, or slow load times, especially on mobile devices and low-end PCs. By following simple guidelines, you can ensure your game runs smoothly while still looking great.
Key Takeaways:
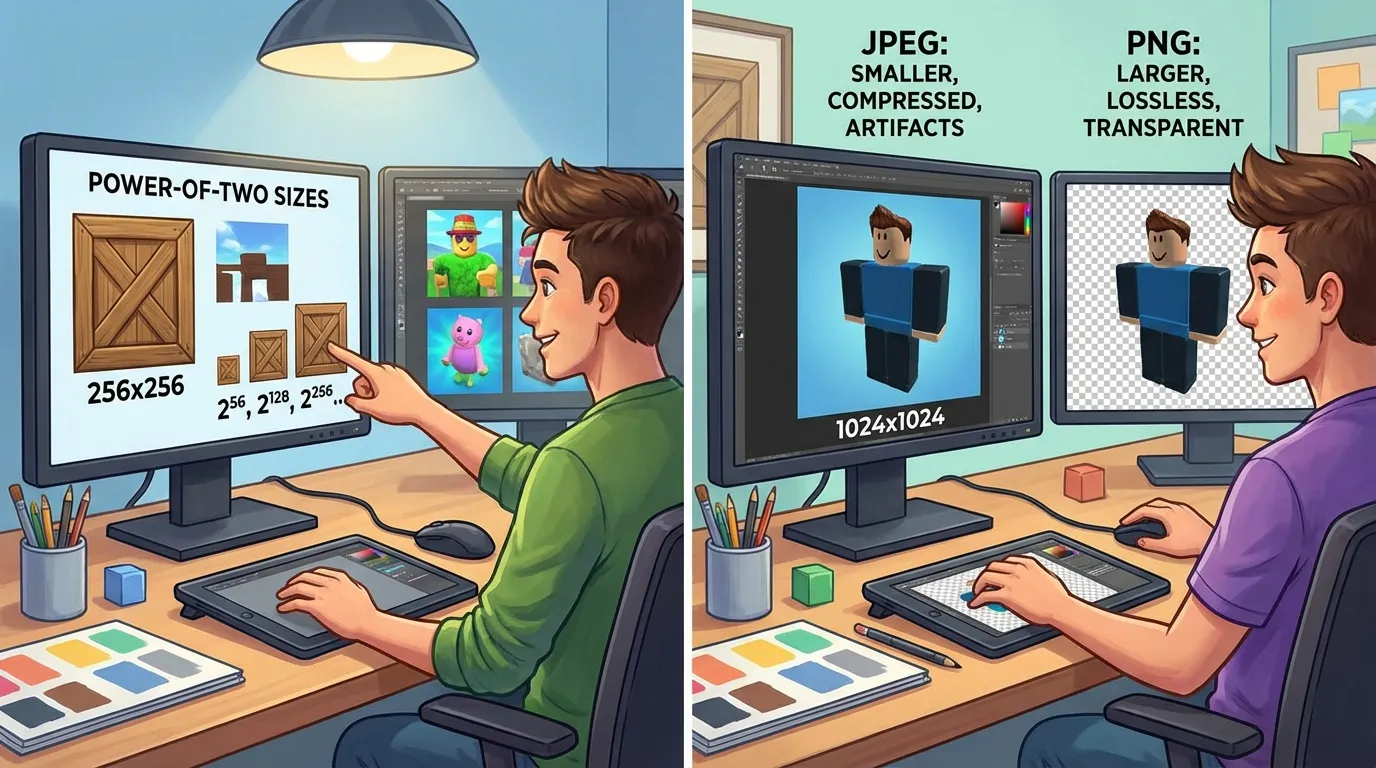
- Keep texture sizes reasonable: Use 256×256 or 512×512 for most assets, and only go up to 1024×1024 for key objects like characters or vehicles.
- Use the right file format: Choose JPEG for opaque textures (smaller file sizes) and PNG for textures needing transparency.
- Reuse textures: Apply shared textures across multiple objects to reduce memory usage and improve performance.
- Stick to power-of-two dimensions: Sizes like 128×128, 256×256, or 512×512 compress better and support efficient rendering.
- Avoid oversized textures: Test in Roblox Studio to ensure textures are not unnecessarily large for their in-game appearance.
Efficient texture use - like creating atlases, limiting unique materials, and testing on different devices - can significantly improve game performance. Always prioritize textures that enhance gameplay without overloading memory or GPU resources.
How to optimize performance on Roblox

Texture Resolution Guidelines
When creating textures, aim for the lowest resolution that still looks good in-game. Using textures that are too low in resolution can make objects look blurry or pixelated, while overly high resolutions waste memory on details that players might not even notice. The key is to align each texture's resolution with the size and visibility of its corresponding object during gameplay.
Match Resolution to Object Size
The size of your object in studs should guide your choice of texture resolution. Here's a general breakdown:
- Small props (1–2 studs wide), like coffee cups, bottles, or small clutter, typically look fine with a 256×256 texture. These items are rarely the focus of attention, so higher resolutions won’t add much value.
- Medium-sized objects (6–8 studs), such as doors, crates, barrels, or furniture, benefit from 512×512 textures. These items are often viewed at mid-range, so they need enough detail to appear sharp but not at the expense of memory.
- Large or hero objects (15+ studs), like vehicles, character skins, or weapons, often justify a 1024×1024 texture. These are the objects players interact with closely, so they require higher detail. However, 1024×1024 is generally the upper limit for performance-conscious workflows in Roblox.
Maintaining a consistent pixel density across your assets is also essential. For instance, a large wall (30–40 studs) might use a single 1024×1024 tileable texture or multiple 512×512 tiles. Applying a 1024×1024 texture to a tiny button, however, wastes memory and resources.
Always test your textures in Roblox Studio, viewing objects at their closest expected distances on both desktop and mobile. This ensures textures remain sharp and details like text or logos are readable without using excessive resolution. Following these practices helps balance visual quality with performance.
| Asset Type | Typical Size (Studs) | Recommended Resolution | Example Use Cases |
|---|---|---|---|
| Small background props | 1–2 studs | 128×128 – 256×256 | Bottles, small decals, clutter |
| Medium gameplay props | 6–8 studs | 256×256 – 512×512 | Doors, crates, barrels, furniture |
| Large or hero objects | 15+ studs | 512×512 – 1024×1024 | Vehicles, character skins, weapons |
| UI sprites (per atlas) | Varies | 512×512 – 1024×1024 | Icons, buttons in texture atlases |
Use Power-of-Two Dimensions
Using power-of-two dimensions (like 128×128, 256×256, 512×512, or 1024×1024) is a standard best practice in game development. These sizes work seamlessly with GPUs, enabling better memory allocation and the creation of mipmaps (lower-resolution versions of textures used for distant objects). This can help reduce shimmering and aliasing, leading to smoother visuals.
Textures with power-of-two dimensions also compress more efficiently, minimizing bandwidth usage and improving rendering performance. Non-standard sizes, on the other hand, can cause issues like visual artifacts and require additional memory padding. If you need non-square textures, opt for power-of-two dimensions like 256×512 or 512×1024, and adjust your UV mapping accordingly.
For mobile platforms, prioritize smaller resolutions like 128×128 or 256×256 for minor props and 512×512 for important assets. On PCs or consoles, you can afford higher resolutions, but always start with a larger texture (e.g., 1024×1024 for a hero object) and downscale until the quality meets your performance needs.
Avoid Oversized Textures
Oversized textures are a common performance bottleneck in Roblox games. They use up GPU memory and bandwidth, leading to longer loading times and lower frame rates, especially on mobile devices or low-end PCs. Overusing 1024×1024 textures across your game can quickly escalate memory usage, increasing the risk of out-of-memory errors.
Before exporting a texture, check its on-screen size in Roblox Studio. Using high-resolution textures for small or rarely seen objects wastes resources without improving visual quality. Aim to use:
- 256×256 or 512×512 textures for most objects.
- 1024×1024 textures only for hero assets or very large surfaces.
Keep individual texture files under 1 MB after compression to manage memory effectively. To identify oversized textures, use Roblox Studio's performance stats (Shift+F3) to monitor texture memory usage. If certain assets consume too much memory, consider resizing the textures in an image editor, re-uploading them, and comparing their performance and visual quality in-game.
Interestingly, while a single 1024×1024 texture is more memory-intensive than a 512×512 or 256×256 texture, it can sometimes be more efficient than using multiple smaller textures. This is because fewer draw calls are required, reducing overhead.
For creators working on complex assets or skins, platforms like Alive Games for Skins (https://alivegames.io) provide tools for designing and exporting optimized textures. These tools include customizable templates and an intuitive editor to simplify the process of creating textures with the right resolutions and formats.
File Formats and Compression
Choosing the right file format and compression settings is just as important as matching resolution to object size when it comes to optimizing performance. The two primary formats you'll encounter are JPEG and PNG, each serving specific purposes. Knowing when to use each format and how to compress textures effectively ensures your game runs smoothly on both desktop and mobile devices while keeping visuals sharp.
JPEG vs. PNG
The choice between JPEG and PNG boils down to one key question: Does your texture need transparency?
- JPEG is ideal for fully opaque textures where transparency isn't required. This includes surfaces like walls, floors, terrain, props, and clothing without cutouts. JPEG's lossy compression results in significantly smaller file sizes, which reduces download times and memory usage. For instance, a 1024×1024 JPEG of a brick wall can often be compressed to under 1 MB with minimal quality loss, whereas a PNG version might be several times larger.
- PNG should be used when transparency or alpha blending is necessary. This applies to elements like decals, UI icons, foliage, fences, tree leaves, grass cards, and accessories with irregular edges. PNG supports a full alpha channel, enabling smooth transitions between opaque and transparent areas without visual artifacts. This is particularly important for details like billboard signs or UI elements where mipmaps might cause fringing on transparent edges.
For developers targeting lower-end PCs, older laptops, or school computers, it's common to prioritize JPEG for most textures and reserve PNG for cases where transparency is essential. It's worth noting that transparency and alpha blending require more processing power, so minimizing their use can improve frame rates.
| Aspect | JPEG | PNG |
|---|---|---|
| Alpha / Transparency | No alpha channel | Full alpha channel support |
| Compression Type | Lossy; smaller files | Lossless; larger files |
| Best Use Cases | Opaque surfaces | Transparency needed |
| Typical File Size | Smaller | Larger |
| Performance Impact | Lower memory usage | Higher memory usage |
How to Compress Textures
While Roblox applies some automatic compression and generates mipmaps for uploaded textures, optimizing your textures before uploading is crucial to reduce load times and memory usage. Here’s how to compress textures effectively:
- Start with a high-resolution texture: Create your texture at a higher resolution, such as 1024×1024, using tools like Photoshop, GIMP, or web-based editors. This provides flexibility during the design process.
- Downscale to the smallest power-of-two size that looks good in preview. For example, if a 512×512 texture maintains quality at typical gameplay distances, there's no need to upload it at 1024×1024. Downsizing not only reduces file size but also cuts memory usage - a 1024×1024 texture uses four times the memory of a 512×512 texture.
- Export in the appropriate format: Save as JPEG for opaque textures and PNG for textures requiring transparency. For JPEGs, aim for a quality setting between 60–80 in your image editor. This range typically balances file size and visual quality for Roblox. Always preview the texture at in-game distances to ensure there are no visible artifacts or quality issues.
- Use an online image compressor: Tools like browser-based compressors allow you to further reduce file size while visually comparing the results. This step is especially popular among developers in the U.S. due to its convenience and effectiveness.
- Test in Roblox Studio: Preview textures in Roblox Studio at normal gameplay distances on mid-range hardware. Use Shift+F3 to monitor texture memory and identify any potential performance issues.
For creators designing character skins or cosmetics, tools like Alive Games for Skins simplify the process. After creating high-quality skins using customizable templates, export them as PNG or JPEG files that adhere to Roblox's texture guidelines. Then, follow the compression steps above: downscale to a suitable resolution (e.g., 512×512), use JPEG for fully opaque skins, or stick with PNG if transparency is needed. Finally, run the texture through an image compressor to keep the file size under 1 MB for optimal performance.
Stick to 8-Bit Formats
When it comes to file format and compression, sticking to 8-bit per channel formats is the most efficient choice. Roblox’s rendering pipeline and typical in-game scenarios don’t benefit from higher bit depths, making standard 8-bit formats like PNG and JPEG sufficient for most textures. These formats already provide 256 levels per channel, which is more than adequate for albedo/diffuse maps, simple masks, and UI art.
Higher bit depths, such as 16-bit or 32-bit, double memory usage without offering noticeable visual improvements in Roblox’s current lighting and material pipeline. For grayscale utility maps - like roughness, metallic, or ambient occlusion - 8-bit single-channel images work perfectly, offering enough precision for material behaviors. You can even optimize further by packing multiple grayscale maps into different channels of a single 8-bit PNG (e.g., roughness in R, metallic in G, ambient occlusion in B). Alternatively, use simple MaterialService settings or single-pixel textures for uniform values, which significantly reduces memory usage.
The only time higher bit-depth files might be necessary is during external workflows, such as baking high-precision height maps or procedural masks. Even then, these files should be converted to 8-bit before uploading to Roblox. By sticking to 8-bit formats, you ensure efficiency without compromising the quality players expect.
Efficient Texture Usage
Once you've nailed the basics of texture optimization, the next step is to make your textures work smarter, not harder. Efficient texture usage can significantly improve performance by reducing memory strain. In Roblox, textures play a big role in memory and rendering demands, so how you manage and reuse them can directly affect how smoothly your game runs. Strategies like reusing textures, creating texture atlases, and cutting down on unique materials can help lower GPU workload while still delivering the visual quality players expect.
Reuse Textures Across Assets
One of the simplest ways to save memory and reduce draw calls in Roblox is to reuse textures across multiple objects. When multiple assets share the same texture, Roblox keeps that texture loaded in memory and processes it together, instead of constantly swapping between different ones. This approach improves frame rates and cuts down on loading times.
For example, you can create tileable base materials like wood, metal, stone, or fabric and apply them to various props. A single wood texture could work for chairs, tables, shelves, and even walls. To make each object look unique, tweak properties like Color or SurfaceAppearance.Color - this creates variety without the need to upload new textures.
This method applies to all kinds of materials. A brushed metal texture could be used on railings, pipes, trims, or machinery parts, while adjustments to roughness or metalness properties can make each object feel distinct. Similarly, decals like logos or labels can be reused across your game world, avoiding the need to upload slight variations.
Large scenes that shift from using many unique textures to a smaller pool of shared ones often run more smoothly, especially on mid-range and mobile devices. This is because shared textures reduce memory and bandwidth usage.
To keep things organized, start by building a small library of global materials - such as wood, metal, concrete, plastic, and glass - and stick to it throughout your project. Name textures clearly (e.g., "Wood_Worn_512" or "Metal_Brushed_256") and organize them by type and resolution. Establish team rules like "check the library before importing" and audit your assets regularly to consolidate duplicates.
For teams working on character skins or cosmetics, tools like Alive Games for Skins can help you create reusable texture sets. These tools allow you to build templates and export them in standardized formats, making it easier to adapt designs across multiple characters or items while staying within Roblox's guidelines.
Create Texture Atlases
A texture atlas combines multiple smaller textures into one larger image, allowing you to source details from a single file instead of multiple separate ones. By mapping different objects to specific regions of the atlas using UV coordinates, the renderer treats them as if they share the same texture. This reduces texture swaps and draw calls, which can significantly boost performance.
For instance, a single 1024×1024 texture can perform better than four separate 512×512 textures, even though they have the same total pixel count. This is because fewer draw calls and texture switches are needed, which is especially helpful for lower-end and mobile devices.
To create a texture atlas, UV-unwrap your assets to fit within one image and pack them into a power-of-two resolution (e.g., 1024×1024). Use this atlas as the albedo texture for all meshes mapped to it, and upload it to Roblox as a MeshPart with a shared texture ID. If needed, you can create matching atlases for roughness, metalness, or normal maps, but try to keep the number of maps low to avoid overloading SurfaceAppearance.
Texture atlases are especially useful for grouping related objects, like all parts of an elevator or an entire furniture set. You can also combine small UI textures, such as buttons or icons, into one atlas, adjusting UVs so each element references its specific section. This approach not only improves performance but also simplifies asset management by reducing the total number of textures.
When designing atlases, add padding between elements to prevent UV bleeding and stick to power-of-two dimensions for efficient compression and mipmapping. While larger atlases reduce draw calls, be mindful of memory usage - if only a small section of a large atlas is visible in-game, you could be wasting memory. For mobile audiences, test both memory consumption and frame rates, and if needed, split oversized atlases into smaller, logical groups.
Limit Unique Textures and Materials
Cutting down on unique textures and materials is key to reducing GPU strain. A good rule of thumb is to keep most textures at resolutions like 256×256 or 512×512, reserving 1024×1024 sizes for hero assets or atlases. Overloading a scene with individual SurfaceAppearance objects and texture maps can quickly lead to inefficiencies.
Treat unique textures as a limited resource. Plan a small library of shared materials that can be used across multiple assets. For example, a single metal atlas could cover all railings and pipes, rather than assigning separate textures to each. Use MaterialService to define custom materials that load a texture only once, reducing draw calls.
Here are some practical tips:
- Replace similar materials with a shared one and adjust properties like color or roughness for variety.
- Combine small logos or detail textures into one or two atlases, remapping UVs so multiple objects reference the same resource.
- For distant background objects, use Roblox's tiling materials or MaterialService entries instead of custom textures, saving bespoke textures for hero assets.
- Avoid overusing semi-transparent textures or overlapping alpha layers - they can increase overdraw and put extra strain on the GPU.
- Use normal and roughness maps sparingly. Bake minor details into diffuse maps or rely on Roblox's built-in materials to cut down on additional texture channels.
To ensure your optimizations are working, monitor texture performance in Roblox Studio. Use tools like Rendering Stats (Shift+F3) to identify bottlenecks and refine your approach as needed. These adjustments, when paired with earlier optimization steps, can help your project run more efficiently while preserving visual appeal.
Advanced Optimization Methods
Once you've mastered the basics, it's time to dive into advanced techniques that tackle challenges like reducing draw calls, cutting down texture memory usage, and minimizing overdraw. These are especially important for ensuring smooth performance on mid-range and mobile devices. Advanced optimization involves refining UV layouts, scaling back on resource-heavy rendering features, and leveraging Roblox's built-in tools to balance visuals and playability. These strategies build on earlier guidelines, targeting the demands of model mapping and rendering.
Optimize UV Mapping
UV mapping determines how a 2D texture fits onto a 3D model. A poorly arranged UV layout can waste texture space, blur details, and cause visual issues like shimmering edges or color bleeding. By organizing UV islands efficiently and maintaining consistent texel density, you can enhance both visual quality and performance.
- Pack UV islands tightly: Arrange islands to fill gaps, rotating and scaling them as needed. For example, two crates of the same size in-game should use similar amounts of texture space. Avoid creating tiny UV islands that may blur when mipmaps are applied.
- Align UV edges to pixel boundaries: This reduces shimmering and halo effects. For instance, when working with a 512×512 texture, snap UV edges to whole pixels instead of fractional values. Tools like Blender can help by enabling a pixel grid or allowing precise numerical inputs. Also, avoid long, stretched UVs that can distort textures - consider adding seams to maintain uniform pixel density.
- Mirror or stack UV islands for symmetrical objects: This technique ensures sharp details, reduces visible seams, and saves texture space for other parts of your model.
- Use padding for texture atlases: Leave 2–4 pixels of padding between tiles in atlases (e.g., 512×512 or 1024×1024) to prevent issues like mipmap bleeding or color halos. Standardizing UV scales across assets also allows for consistent application of tiled textures, such as wood or stone, without noticeable stretching or repetition.
Once your UV layouts are optimized, the next step is to address performance-heavy rendering features.
Reduce Performance-Heavy Features
Efficient texture management goes beyond file size and reuse. Some rendering features, like normal maps, transparency, and metallic/roughness maps, can strain the GPU. Use these features sparingly and only where they make a clear visual impact.
- Normal maps: These require extra processing for texture lookups and calculations. Reserve normal maps for close-up objects, like a character's weapon or a prominent building facade. For background props or smaller items, bake lighting and details directly into the base color (albedo) texture.
- Transparency: Transparency can be GPU-intensive, as it often involves extra rendering passes and depth sorting. Use it only when absolutely necessary, such as for windows or water surfaces. Avoid semi-transparent noise patterns or overlapping alpha layers. Instead, opt for fully opaque geometry or masked cutouts, where pixels are either completely opaque or transparent.
- Metallic and roughness maps: These can be demanding when used excessively or at high resolutions. If a material's metallic or roughness properties are uniform, replace the full-resolution map with a simple 1×1 solid-color texture to save memory and bandwidth.
To conserve resources, developers are encouraged to use textures no larger than 1024×1024 pixels, but most assets can perform well with resolutions of 512×512 or even 256×256. Additionally, reusing materials across multiple meshes reduces texture switches and draw calls, ensuring smoother gameplay while maintaining visual appeal.
Use Roblox Built-in Tools
Roblox Studio provides a range of tools to help you monitor and optimize performance, making it easier to implement these advanced techniques.
- Performance Stats and Microprofiler: Press Shift+F3 in Roblox Studio to view key metrics like texture memory usage, draw calls, and GPU frame times. These tools help you identify bottlenecks and measure the impact of your optimizations.
- RenderFidelity settings: MeshParts have options like Automatic or Performance, which allow Roblox to reduce mesh complexity on lower-powered devices. This adjusts levels of detail (LODs) dynamically, reducing the GPU load without requiring additional effort from developers.
- Disable CastShadow for minor elements: Shadows can be computationally expensive. Turning off shadows for small or non-essential parts, like interior clutter or background props, can significantly improve frame rates without noticeable visual loss.
- MaterialService and tiled materials: Using Roblox's built-in materials through MaterialService is more efficient than assigning individual textures. Shared materials are loaded once and reused across meshes, cutting down on texture switches and improving memory usage. Similarly, SurfaceAppearance and custom materials are better suited for textured parts than applying separate textures to each face.
For those designing character skins or cosmetics, tools like Alive Games for Skins simplify the process. Their browser-based editor and reusable templates allow creators to design high-quality skins optimized for Roblox without needing additional software. These tools also help manage texture size, format, and layout for better performance.
Conclusion
Optimizing textures with the right resolutions, formats, and reuse strategies is a must for ensuring smooth gameplay on Roblox. It’s all about striking a balance between visual quality and performance, especially given the variety of devices players use. Most U.S. players are on mid-range PCs, laptops, tablets, and smartphones, where performance hiccups like frame drops and stuttering are far more noticeable than small visual differences - like using a 512×512 texture instead of 1024×1024 for a background prop. By reducing file sizes, minimizing format overhead, and reusing textures effectively, you can achieve smoother frame rates and quicker load times, even in expansive maps.
Summary of Best Practices
- Match texture resolution to importance and distance: For most objects, 256×256 or 512×512 textures are ideal, while 1024×1024 should be reserved for key items like main characters, weapons, or interactive props. Always stick to power-of-two dimensions (128, 256, 512, 1024) to optimize compression, mipmapping, and GPU performance.
- Choose the right format: Use PNG for textures requiring transparency, such as UI elements or decals, and pick JPEG for opaque textures like backgrounds or surfaces to keep file sizes manageable. Aim for file sizes under 1 MB whenever possible to reduce network load and memory use.
- Reuse and consolidate: Reusing textures across multiple assets and organizing repeated details into texture atlases can significantly cut down on draw calls and memory usage.
- Minimize unique materials and transparency: Limit materials and use transparency only when necessary (e.g., glass, water). Avoid overusing normal or specular maps. Often, one larger texture is more efficient than several smaller ones with the same total pixel count, as it reduces texture switches.
Tools like Alive Games for Skins can simplify skin design and exports with templates and browser-based editors that ensure your textures are optimized for gameplay.
Keep Testing and Improving
Regular testing is key to maintaining performance. Use Roblox Studio's performance stats (Shift+F3) to monitor GPU memory, texture memory, and frame time. The Microprofiler and Rendering Stats tools can help you track triangle counts, texture usage, and draw calls during gameplay.
Test your project on commonly used U.S. devices, like budget Windows laptops, mid-range gaming PCs, iPads, and Android smartphones, to ensure it runs smoothly across the board. Periodically audit your project for unnecessary textures, unused assets, or oversized maps, and clean them up to keep everything streamlined. Keep a simple internal checklist - covering resolution, format, reuse strategies, and transparency - and review it before every update to make optimization a routine part of your workflow.
Take the time to review your current project. Check resolutions, formats, opportunities for reuse, and atlas usage, then test the performance on actual devices. Make a few specific improvements and measure their impact. Save this checklist in your studio documentation or version-control notes so every new map, character, or asset includes texture optimization as part of the release process. Share the results with your team - like reduced texture memory or better FPS on a typical laptop or phone - to encourage a mindset that values performance alongside visuals. Smooth, responsive gameplay across diverse hardware is what makes Roblox experiences stand out, and texture optimization plays a big role in achieving that.
FAQs
What is the best way to choose the right texture resolution for objects in Roblox?
When deciding on the right texture resolution for objects in Roblox, think about both the size and the role of the object in your game. For objects that are large or frequently seen by players, go with higher-resolution textures like 1024x1024 for better detail. On the other hand, objects that are smaller or less noticeable can use lower resolutions, such as 256x256, to conserve memory and improve game performance.
The key is finding a balance between visual quality and optimization. Test how textures look in your game environment and tweak the resolutions to keep them clear without overloading system resources. Don’t forget to compress textures to shrink file sizes while keeping quality intact.
Why should you use power-of-two dimensions for textures in Roblox games?
Using power-of-two dimensions like 256x256 or 512x512 for textures in Roblox games comes with some clear benefits. These dimensions are specifically optimized for graphics processing, which means your game can run smoother and load faster. They also make compression more efficient, helping to shrink file sizes while keeping the texture quality intact. Plus, game engines such as Roblox are better equipped to handle these textures, boosting both compatibility and the overall visual consistency of your game.
How can reusing textures for multiple assets enhance performance in Roblox?
Reusing textures across different assets is a smart way to improve game performance. By cutting down on the number of unique textures the engine needs to process and store, you can reduce memory usage and speed up load times.
This approach doesn't just make your game run more efficiently - it also provides a smoother experience for players, particularly those using devices with lower hardware specs.