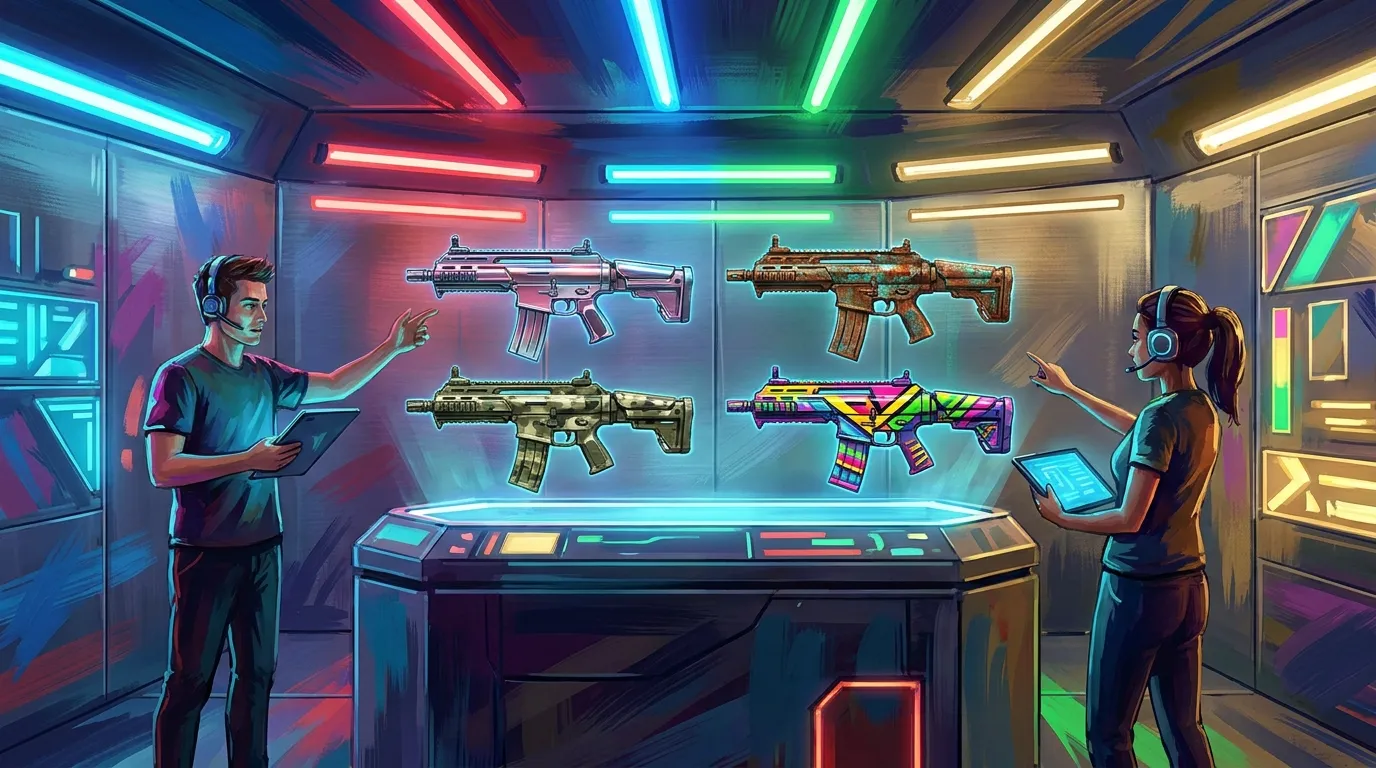
CS2 Weapon Skin Finish Styles Explained: Anodized, Patina, Spray, and Custom Paint
If you make or study game cosmetics, finish types matter a lot. In Counter-Strike 2, cs2 skins are not just flat images placed on a gun. The finish style changes how color, wear, shine, and texture actually show up on the weapon model. That’s where a lot of new creators run into trouble, often pretty fast. A design can look great in Photoshop, then seem too dull, too busy, or worn in the wrong spots once it appears in-game.
Understanding these finish rules helps developers, modders, and creative players make better-looking assets in more than just CS2. The same design ideas also carry over to Roblox outfits, FiveM liveries, GTA multiplayer items, and similar projects, which helps if you move between games. This guide explains four of the most important cs2 weapon finishes: anodized, patina, spray, and custom paint. It covers what each one does, where each works best, which mistakes to watch for, and how to choose the right finish for your concept. It’s all pretty simple, and really useful. If you’re building a skin workflow with tools like Alive Games, this can help you make smarter creative choices earlier in the process.
Why finish style matters in CS2 skin design and cs2 skins
Valve’s official workshop style guide is the main reference for creators. It explains that CS2 has multiple finish styles, and each one has its own material rules and wear behavior. That small difference changes a lot. The same artwork can look very different depending on the finish you pick. A metallic pattern in anodized will not behave like a hand-painted design in custom paint. A rough, aged concept can feel right at home in patina, while in spray the same idea may look thinner or less convincing.
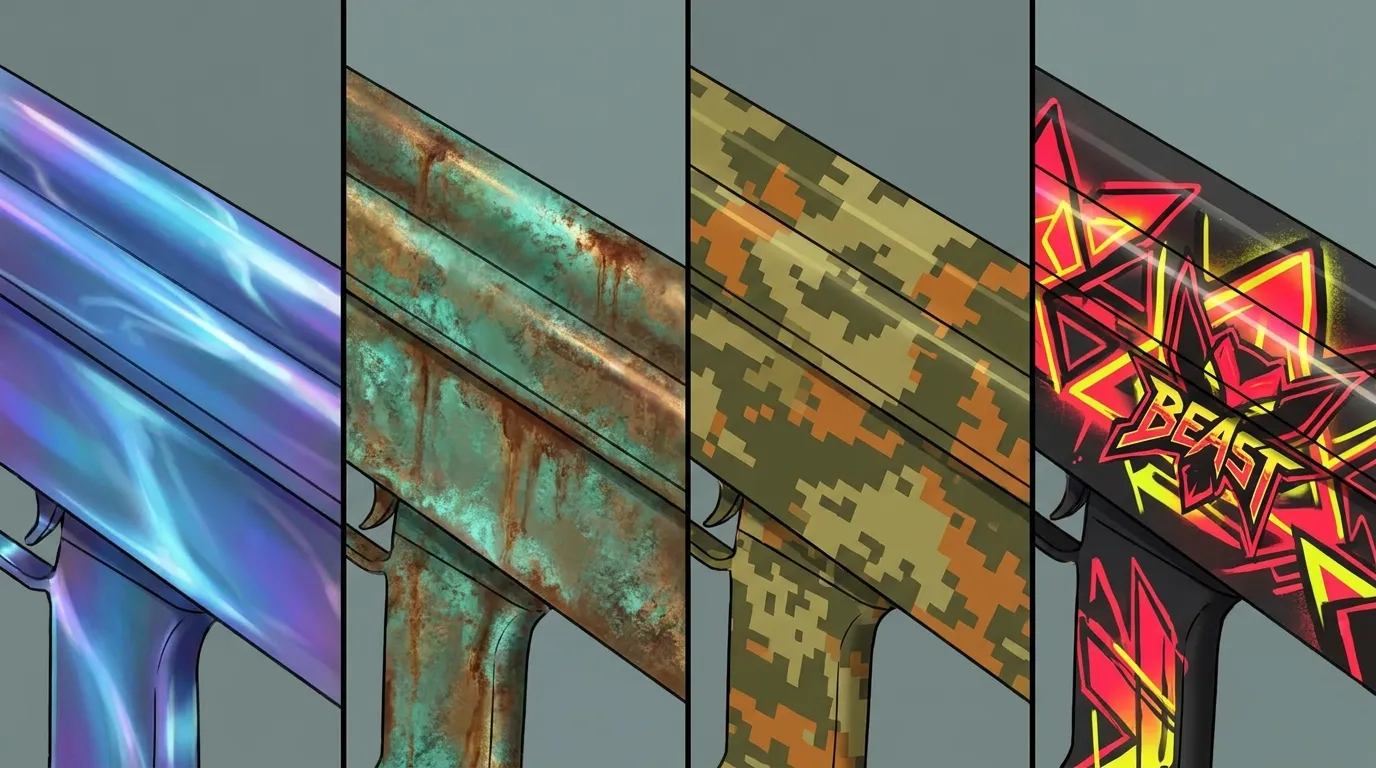
Here’s a simple way to compare the four styles covered in this article.
| Finish Style | Best For | Wear Look |
|---|---|---|
| Anodized | Clean metallic color and crisp pattern | Usually controlled, sleek wear |
| Patina | Aged metal, chemical tint, industrial looks | Natural uneven aging |
| Spray | Stencil, camo, simple layered graphics | Soft faded painted wear |
| Custom Paint | Illustrated art, characters, bold graphics | Most flexible visible paint loss |
Finish type affects style, storytelling, and production time. For simpler concepts, spray and patina can be faster choices, which makes them useful for testing ideas. Custom paint needs more planning because every visible detail matters. If stronger fundamentals would help before building a full collection, these proven methods for designing game skins can help you avoid common layout issues and readability problems. Additionally, learning about Abstract vs. Geometric Patterns for Game Skins can refine your approach to cs2 skins pattern balance.
There is also the question of player expectation. In the CS2 skin market, people connect certain looks with certain finish families. Picking the right one helps a skin feel believable within the Counter-Strike visual language, especially when players already expect specific materials and wear patterns from each finish style.
Anodized finishes: clean, shiny, and controlled
Anodized styles are a good fit for a polished, metal-first look. Smooth color shifts, reflective surfaces, and precise patterns tend to feel built into the material instead of painted on top of it, and that is a big part of the appeal. It also makes anodized one of the more useful cs2 weapon finishes for futuristic skins, premium esports looks, and designs that stay simple while still looking expensive.
Its biggest strength is clarity. Shapes stay easy to read, color blocks look crisp, and fine pattern work can feel elegant instead of crowded. Because of that, many creators use anodized for sleek blues and reds, along with golds and deep black-metal themes, since those usually work well with the finish. For players who like modern, high-status cs2 skins, anodized is often a good first option.
It does come with limits, though. Since anodized depends on material response, weaker color choices can leave the whole skin looking flat. A pattern that feels exciting in a 2D mockup may fade once the in-game lighting changes. Testing contrast early usually fixes a lot of that. Dark tones need enough depth, highlights should feel intentional, and tiny details that only work up close are usually best avoided because they disappear quickly.
Start with a base metal tone and a pattern overlay, then check a wear preview. After that, see how the skin looks from a normal play distance. Does it still feel premium when the gun is moving fast? If it does, anodized is probably the right finish.
Patina finishes: age, chemistry, and texture storytelling
Patina is a great fit for skins that need real character. Instead of looking factory-fresh, these finishes feel weathered, oxidized, stained, or chemically treated, and that is exactly where their appeal comes from. They carry a strong mood and can feel military, industrial, historical, or even post-apocalyptic. For anyone who likes worldbuilding, patina is one of the more interesting cs2 skin finish paths to look at.
Restraint does a lot of the work here. Patina is about believable surface change, not random dirt thrown across the weapon. The best designs usually lean on subtle greens, bronzes, browns, and heat-tinted tones. Exposed metal and realistic wear zones help too, because those details make the finish feel believable. A good patina skin can suggest a whole backstory. Maybe the weapon sat untouched in storage, or maybe it saw field use and spent years in a rough environment.
It is also easy to overdo patina. If the whole surface looks heavily aged, the design starts to lose contrast and can get muddy fast. Shape flow matters just as much. Oxidation and discoloration should follow the weapon’s form instead of fighting it. Darker areas usually make more sense in recesses, while warmer or cooler shifts should appear where they feel natural.
The same patina ideas work well in other game ecosystems. FiveM and GTA creators use similar texture logic for worn police gear, rusted vehicles, and faction equipment. If that crossover sounds interesting, this FiveM skins customization guide for server developers explains how style choices can support roleplay and server identity in a clear way.
Spray finishes: simple layers, camo logic, and readable patterns in cs2 skins
Spray finishes are easy for beginners to learn, and that doesn’t make them any less useful. They work well because they rely on simple shapes, repeated marks, stencils, and layers of paint. For camouflage, street-art energy, military themes, or quick concept testing, spray is a practical type of finish. It’s especially good for putting ideas down fast.
The best spray skins usually have a clear pattern rhythm. Repeating shapes across the whole weapon helps the design feel planned and keeps everything connected. Sticking to two to four main colors usually works best; once you go past that, the result can start to feel messy. Keep the biggest shapes broad enough to read from a distance, then add smaller passes for texture or breakup. Those smaller details help, but this style works best when the overall design is still easy to read at a glance.
A useful step-by-step approach looks like this:
Build spray skins in four passes
Start with a base color that fits the mood, since that choice sets the tone right away. Then add larger stencil or camo shapes. After that, bring in a smaller second layer for extra depth. Fourth, preview the wear so it’s easier to catch spots where fading helps the design instead of hurting it before you lock anything in.
Spray styles work really well for creative players who want lots of versions fast. Desert, forest, winter, and urban palettes are all easy to test without rebuilding the whole concept. That makes spray a good fit for both studios and hobbyists, and it’s also an easy way to get into decal work. Want to go further with graphic overlays and emblem placement? That’s covered in Designing CS2 Stickers and Decals: A 2026 Creator’s Toolkit. For deeper color control tips, check out How to Use Color Theory for Game Skins.
The biggest trap is adding too much detail. It’s an easy mistake to miss. Spray should still look sprayed, and if it starts to read more like a full illustration, custom paint is probably the better choice.
Custom paint: maximum freedom, maximum responsibility
Custom paint gives you the most flexibility of the four finish types in this article. It works best if your idea needs clear art direction right on the surface: creatures, characters, symbols, hand-painted themes, comic styles, graphic scenes, or bold color storytelling. Many of the most memorable cs2 skins use this style for that exact reason, since it gives creators more room to build a clear visual identity.
It also asks more from you. Because the art sits more directly on the weapon, every choice is easier to notice. Composition matters more, and silhouette flow does too. If a face, logo, or main graphic ends up on a broken or hidden part of the model, the skin can fail even if the illustration itself looks good, and that can happen fast.
Start with the weapon’s shape language. Mark the most visible areas first, then place the main focal point where players will really see it during normal gameplay. Secondary details should guide the eye instead of fighting with the main idea. The best custom paint skins usually have one standout element, backed up by controlled patterns, line work, and color accents.
Common mistakes include mixing too many themes, pushing saturation too far, ignoring wear, or depending on details that disappear too easily. Some designs look amazing in factory-new condition, then fall apart once wear removes important paint areas. Before you commit, preview multiple wear states and check how the design holds up across them.
How to choose the right finish for your concept
A quick question can save a lot of extra work: is the idea mainly about material or about art? If it leans toward a metallic feel, chemical aging, or a surface-led process, anodized or patina is usually the right place to start. If the concept is really centered on graphic layering or painted storytelling, spray or custom paint makes more sense from the start.
The finish can also match your production goals, which helps cut down wasted time.
- Use anodized for sleek premium skins
- Pick patina for gritty realism, aged metal stories, and a rougher look
- spray works well for clear camo, stencils, and fast variations
- Use custom paint for bold hero designs and more detailed art
That same logic works outside CS2 too. Teams building content pipelines for Roblox clothing, GTA accessories, or FiveM assets can get good results by thinking this way. Start with the visual behavior you want, then build the artwork around it. That usually makes iteration faster and keeps asset packs feeling consistent. Moreover, reading Custom Export Presets for Roblox Skins can help creators align cs2 skins workflow with other platforms.
For creators using online editors and templates, planning ahead usually works better than guessing. A better finish choice early on usually means fewer redesigns later, so the process stays smooth and the final set feels more consistent.
Put your finish knowledge into practice
The best CS2 skin creators usually start with a more useful question than “What looks cool?” They ask how the surface should work. That change shifts the whole design process. Anodized gives a clean metallic feel, while patina adds history and texture. Spray works well for quick, readable pattern systems. Custom paint gives more space for detailed creative storytelling.
For game developers, this kind of finish knowledge makes it easier to build better cosmetic systems. Modders can carry style logic across different games more easily. Creative players can use it to make cs2 skins that feel more real and polished. And for anyone working across platforms like Roblox, CS2, FiveM, and GTA, finish thinking can become a regular part of an art pipeline used again and again, which also saves time.
Why not start with something small? Pick just one weapon. Try the same concept in two different finish styles and compare them side by side. You will notice how wear, lighting, and shape change the result. Testing it yourself teaches more than guessing. Once these core cs2 weapon finishes make sense, designing feels more controlled and confident, with a clearer eye for what actually works in-game.