Roblox Clothing Editor Tips to Avoid Upload Issues
TLDR; The article explains that most Roblox clothing upload issues usually come from process mistakes, not bad art. It’s usually not the artwork itself. Common problems include picking the wrong item type, resizing classic templates the wrong way, and missing account or moderation requirements, which happens a lot.
For classic apparel, creators should use official Roblox clothing templates at exactly 585x559 pixels. Guide layers need to stay hidden, and seam previews matter because trial-and-error uploads often waste time and can cause even more confusion, even if they seem faster at first.
It also points to newer platform rules like upload fees, possible Premium requirements for public publishing, and validation checks that may block items during upload. So the process matters just as much as the design, especially during upload and publishing.
The main idea is to create a repeatable asset pipeline for Roblox clothes: organize files by clothing type, test drafts first, track versions and costs, and use a pre-upload checklist to reduce rejections and wasted Robux. Simple habits often lead to better results.
If you use a roblox clothing editor, you probably already know the hardest part is not always the art. A lot of creators can sketch a cool hoodie, shirt, pair of pants, or another clothing idea without much trouble. The real frustration usually starts later, when the file does not upload, the item gets rejected, or the clothing wraps badly around the avatar’s torso, arms, or legs. That kind of issue can waste time, Robux, and a lot of energy. Honestly, it gets frustrating fast.
This matters even more now because the Roblox creator space is huge. Research shows Roblox reached 144 million daily active users in Q4 2025, up from 85.3 million in Q4 2024. Other recent summaries also mention around 3.5 million developers and over $1.5 billion in community developer earnings in 2025. In a market this big, even a small upload mistake can slow serious creators down, especially when they are uploading often, which many of them are.
For game developers, modders, and creative players who also work on CS2 skins, FiveM clothing, GTA assets, or similar projects, the pattern is usually familiar: good design needs a clean process. In Roblox, that means using the right roblox clothing templates, understanding the difference between classic and layered items, and checking account and moderation rules before publishing. It usually comes down to handling each step carefully, including file setup, template fit, and upload checks, instead of guessing your way through it.
This guide breaks the process into simple steps. It covers how to set up files, how to create roblox clothes with fewer errors, what policy changes affect uploads, and what to check when things still go wrong. Keep this checklist open while you work if you want cleaner uploads with less guessing and fewer annoying rejections. In most cases, that makes the whole process easier.
Know what kind of clothing you are making first in the roblox clothing editor
A lot of upload problems actually start before the design work is even done. Someone might think they’re making one kind of item, while Roblox reads it as something else. That often leads to the wrong templates being used, export settings no longer matching, and the upload failing later, which gets frustrating fast.
The first thing to figure out is the main split: classic 2D clothing and newer 3D avatar items like layered clothing. Classic shirts and pants use flat image templates, and that is a completely different system. Layered clothing and other avatar items go through a separate pipeline instead. So even if a file looks perfectly fine on screen, using a roblox clothing editor with the wrong setup can still cause it to fail during upload.
Research also shows Roblox has made marketplace controls stricter. Current publishing rules for 2D clothing may require Premium 1000 or 2200 for public publishing, and 2D uploads for personal use now include an upload fee. In practice, that usually means every failed attempt costs more than just time, and that is often the first part people notice.
| Item Type | Typical Format | Key Risk |
|---|---|---|
| Classic 2D clothing | Image template | Wrong size or bad alignment |
| Layered clothing | 3D asset workflow | Wrong pipeline or validation issue |
| Marketplace publishing | Account requirement check | Missing Premium or verification |
That table makes the first question pretty clear: What am I uploading? For anyone new to classic apparel, this guide can help before a first public upload: Roblox Shirt Templates Guide: Step-by-Step for Beginners. If the item is a jacket or other outerwear, this guide to layered clothing templates can help you avoid ending up in the wrong system. Additionally, if you are working on vintage or formal sets, see 1940s Gangster Suit Templates for Roblox for detailed examples.
One simple habit can help a lot here. Label project folders by item type, like ‘classic shirt’, ‘classic pants’, ‘layered jacket’, or something similar. It’s a small step, but it can stop a surprising number of upload mistakes.
Use the official template size and don’t resize it badly in your roblox clothing editor
If there’s one rule creators often want right in front of them, it’s this: classic Roblox clothing needs the correct template dimensions. Official and community-backed references point to 585x559 pixels for a classic shirt or pants template. It’s a simple rule, but it matters. When an image is too large, too small, stretched, or cropped the wrong way, the upload can fail or the clothing can look off, which happens more often than people expect.
A lot of creators still get this wrong. They download a template, open it in Photoshop, GIMP, Photopea, or another Roblox clothing editor, and then resize the canvas to give themselves more room. That usually throws the whole layout off. The torso, sleeves, and legs no longer line up where Roblox expects them, and the result can get messy fast.
Here’s the safe process:
Start from the base file
Download the official clothing layout and keep one clean copy you don’t edit, seriously, leave it alone. Then work only with duplicates, since that is usually the safest way.
Keep the exact canvas size
Avoid scaling the whole template, since that can often throw things off. If needed, you can zoom in while editing. Just make sure the exported file stays exactly 585x559, because that matters.
Design inside the zones
Each panel wraps around a different part of the body, and that really matters. If your art goes past the panel edges and doesn’t line up well, you’ll likely end up with visible seams.
Export cleanly
Use a normal image export with a clear background when needed, but watch for accidental compression, blur, and hidden guide layers, since those are easy to miss.
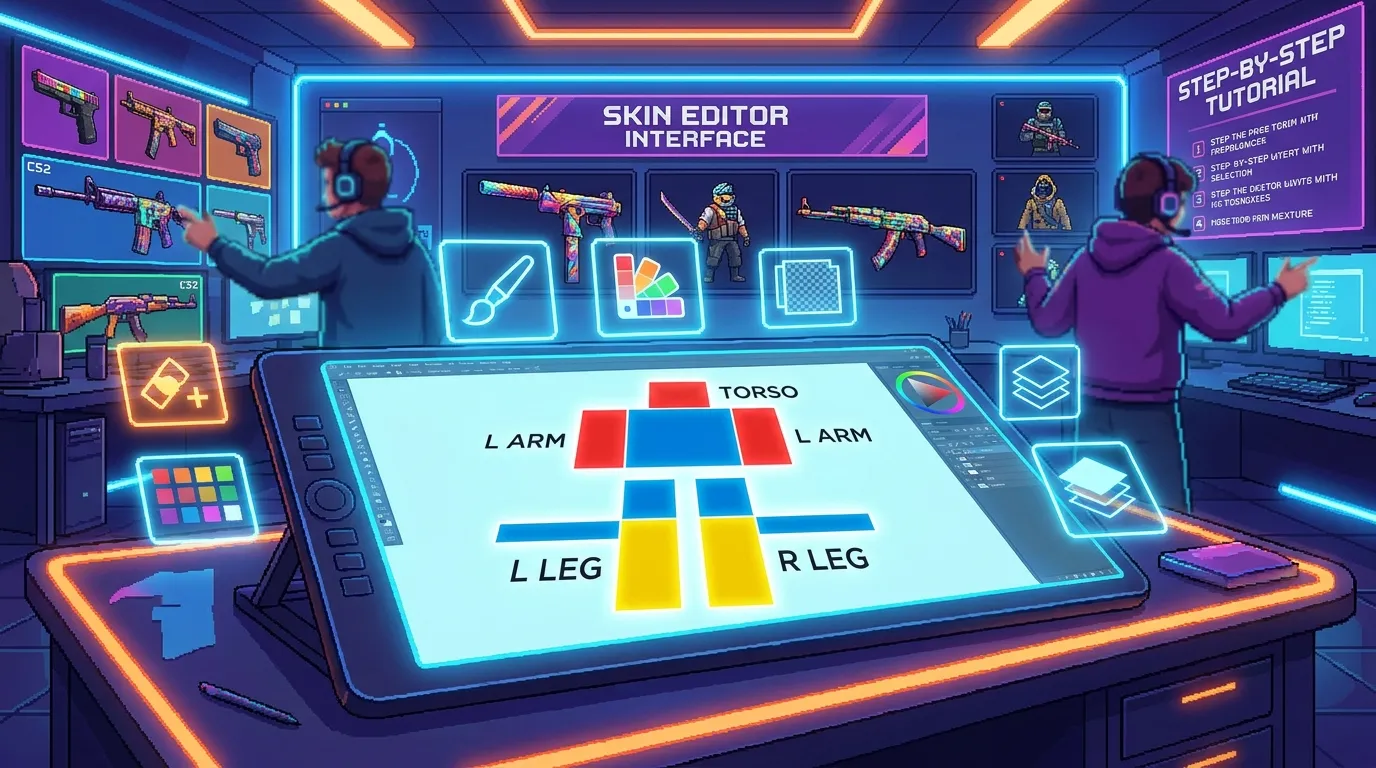
It often helps to think of the template like a folded cardboard box, since that is probably the simplest way to picture it. Each face connects to another. If one side shifts even a little, the box may still fold, but the print can look wrong along the edges. So exact roblox clothing templates really matter here.
For more quick layout examples, check Roblox Shirt Templates: Quick Design Tips for additional editing references.
Validation and moderation begin earlier than most creators expect in the roblox clothing editor
Many people think upload problems only show up at the very end, right before an item goes live. Roblox documentation shows something else: initial validation and moderation happen during upload. That means a file can fail much earlier than the selling stage, which often surprises creators.
So just having a valid image is not enough. The item also has to follow platform rules, and that takes a different way of thinking. This is especially true for creators coming from looser modding spaces like older GTA texture swaps or private server skin tests. Roblox works more like a regulated marketplace, where the upload process checks more than file quality. It can also check whether the asset follows the rules and whether the account can actually publish it.
To proactively address marketplace safety, we are updating our 2D avatar item uploading and publishing requirements along with the reduction in 3D avatar item upload fees which go into effect immediately.
That detail explains a lot. Upload issues are not always bugs. Sometimes, they come from safety rules, originality checks, or account requirements. Official creator documentation explains that the broader avatar workflow starts with making assets in external tools. From there, creators import or upload them, then publish through the dashboard. And validation can stop that process during upload, which is the part people often miss.
A quick example helps show the difference. One creator makes a clean shirt template, exports the file, and assumes the work is finished. Another creator spends an extra minute checking whether the item type is allowed, whether the account can publish, and whether the artwork could trigger moderation. It is a small step, but it will often save time here.
Allow advertising and social cookies to watch embedded videos.
For people who also build assets for other games, it helps to think of this like a game build check. In CS2 or FiveM workflows, one wrong file path can break the final result. On Roblox, one failed rule check can stop the upload, so it usually makes sense to treat that upload step as a real checkpoint instead of just the last click.
Watch the new fees, Premium rules, and publishing changes for roblox clothing editor users
A good roblox clothing editor workflow is not only about the art. It also helps keep costs under control, and that can matter quickly. Repeated failed uploads can cost a lot more now, because current research points to real fees and stricter publishing rules.
One verified Roblox staff statement says:
All new 2D avatar items have a 10 Robux upload fee.
Research also shows 3D avatar item uploads are 300 Robux, down from 750 Robux. There is also a reported 5 Robux price floor for 2D avatar items. Public publishing for 2D clothing may also require an active Premium 1000 or 2200 subscription. Depending on the publishing path being used, some flows may also require identity checks.
For serious creators, that changes the best approach. In the past, some people treated uploads like trial and error, but that gets expensive now. In most cases, it makes more sense to test a design carefully before uploading it.
A simple workflow that many organized creators use looks like this:
Build a pre-upload checklist
Include size, transparency, panel alignment, file name, account status, and item type, all pretty basic, I think.
Make a test version first
Start with a simple flat-color draft, just a quick one. It’s mainly to check that the wrap works, you know.
Save version numbers
Use names like shirt_v1, shirt_v2_shadowfix, or shirt_final_upload to keep versions easy to track.
Track your costs
If you make Roblox clothes often, it helps to track each upload attempt, because small mistakes can quietly eat up your Robux and are really easy to miss. It’s a simple habit, but it will likely save you money over time.
This kind of planning often works well for creators across games. People designing for Roblox, FiveM, or GTA already use versions, templates, and asset budgets, so tracking usually fits into that process. Platforms like Alive Games also feel like a good match for that approach, at least in my view, because more creators want repeatable systems instead of random one-off experiments. Similarly, you can explore How to Create Custom Roblox Skins: Beginner’s Guide to understand more about organized workflows.
Fix the design mistakes that cause visual rejects and bad wraps in roblox clothing editor projects
Some uploads fail completely, while others go through and still look broken on the avatar, which is frustrating. That usually comes down to workflow problems. If shirt seams are off, sleeves don’t match, or torso details look stretched, the issue often starts in the design file.
The most common visual mistakes are usually pretty simple:
Misaligned edges
A stripe on the front torso should line up cleanly with the side panel, especially in that spot. If it’s off by even a few pixels, you’ll probably notice the seam. Slight, but still obvious.
Over-detailed art on small areas
Tiny zippers, thin chains, and very small logos can blur, and that happens a lot. On Roblox classic clothing, the canvas is small, so bigger, clearer shapes often work better.
Wrong shading direction
If one sleeve is shaded from the left but the torso is shaded from the right, the clothes will probably just look fake. And maybe a bit off.
Hidden template guides exported by accident
Some creators leave notes, guide colors, or rough marks on a visible layer, it happens more often than people think. That can lead to messy results or even moderation issues, which most people probably want to avoid.
One useful habit is previewing the item from four distances: very close, medium, far, and then one quick overall glance. Up close, check the seams. At medium range, focus on the full shape. From farther away, the main goal is making sure the design still reads clearly. It sounds simple, but it usually catches a lot. This is basically the same method many skin artists use in CS:GO, CS2, and GTA liveries, since strong contrast and clean forms usually hold up better than tiny details in most cases.
If patterns are part of the design, using Roblox templates with custom patterns explains that in more detail. Repeating textures can create seam errors pretty easily when they are placed badly, so this usually helps catch problems earlier.
Build a cleaner workflow like a real asset pipeline for your roblox clothing editor
A simple way to avoid upload problems is to stop treating every shirt like a random one-off art file. It usually works better to handle it like a small production pipeline instead. That might sound fancy at first, but it’s really just a repeatable set of steps you can use every time.
One useful approach is to keep one folder for source files and another for exports. Save untouched roblox clothing templates in a locked folder so they do not get edited by accident. A naming system that shows the item type right away, like shirt or pants, also makes things easier. Before each upload, preview everything, and keep a note of what changed between versions.
That process helps because Roblox is now big enough to work more like a creator economy than a hobby-only site. Research shows around 36.7 million monthly unique paying users and more than $1.5 billion in community developer earnings in 2025. On a platform at this scale, a clean process rarely feels excessive. It often separates a smooth upload from having to backtrack later.
Creators working across games already understand this. A FiveM clothing pack and a CS2 sticker sheet can benefit from many of the same habits as a Roblox shirt. Master templates, version control, consistent export settings, and review passes all help, even when the game is different. Different game, same production logic.
What should go on a simple one-page checklist next to the editor? Include: ‘Correct item type?’, ‘585x559?’, ‘Guide layers hidden?’, ‘Account eligible?’. It also helps to add ‘Preview checked?’ and ‘Upload budget noted?’. Small habits usually prevent big frustration, and they can save time on something as simple as catching a wrong export before upload.
Special cases: pants, uniforms, and theme packs for roblox clothing editor users
Some clothing types are simply harder to get right than others. Pants often cause problems because the leg panels are narrow, so they’re easy to misread, and that happens a lot. Uniforms, tactical outfits, formal suits, and similar styles can be tricky for another reason: they depend on clean, sharp lines. When the seams are even a little off, the mistakes usually show up quickly, and you’ll likely notice them right away.
For jeans, cargo pants, police uniforms, or military sets, it usually helps to block in the bigger shapes first. Pockets, stitching, badges, and other small details are better added after the base wrap already looks right. That usually saves time, because polishing tiny details before the underlying map is correct gets frustrating in most cases. You can also explore Roblox Military Shirt Templates Guide or Roblox Police Uniform Templates: Guide for more theme-specific examples.
Theme packs need consistency too. When putting together a full set for a roleplay server, clan, or dev team, choose one shading style and keep the color logic consistent as well. The shirt, pants, and jacket should look like they belong together. That matters in Roblox, of course, but it also carries over to FiveM or GTA multiplayer customization. Matching tones and shading often make the whole set feel more believable.
There will probably be more structure around apparel publishing over time. Roblox keeps tightening marketplace safety and originality rules, so older tutorials can become outdated pretty fast. When you create roblox clothes, make sure the guide you use still matches the current rules, fees, and publishing requirements before spending time on it. That way, outdated advice is less likely to surprise you.
Choosing tools that help instead of hurt in your roblox clothing editor workflow
Not every design tool is a good fit for Roblox clothing. The best roblox clothing editor is usually the one that helps you stay precise, not the one loaded with the most effects. A lot of creators do completely well with simple editors because what they really need is layers, guides, transparency control, and exact export settings, and honestly, often not much more than that. Nothing extra.
When comparing tools, four basic questions usually help. Can it keep the exact 585x559 size? Does it handle layers the right way? Can you zoom in close without changing the image size? And does it export cleanly without accidentally switching the format? In everyday use, those are often the details that make the biggest difference.
If the answer is yes, the tool is probably enough. Fancy effects usually matter less here. That is why some creators use advanced software, while others stick with lighter browser-based tools, which in many cases work perfectly fine. Here, precision is often what really matters.
For teams and studios, a shared template library is often the best setup. Everyone starts with the same base files, follows the same naming rules, and checks the same upload list. Simple stuff, but it makes working together easier and helps cut down on rework because people are not fixing the same mistakes again and again.
For creators moving between games, it also helps to organize things by category. Roblox templates, FiveM apparel files, CS2 skin art, and GTA textures should stay clearly separated so resolutions do not get mixed up and export habits from one game do not carry over into another, which happens more often than people think.
Frequently Asked Questions
What is the correct size for classic Roblox clothing templates?
The standard size for classic shirt and pants templates is 585x559 pixels. If you change that size, your upload may fail or the clothing may wrap badly on the avatar.
Why does my Roblox shirt upload but look wrong on the avatar?
This usually means the panel alignment is off, not that the upload itself failed. Check seams between torso, arms, and side panels, and make sure you did not stretch the template while editing.
Do I need Premium to publish Roblox clothing?
Current research shows public publishing for 2D clothing may require Premium 1000 or 2200. Rules can change, so always check the latest marketplace requirements before you upload.
Are Roblox clothing uploads moderated right away?
Yes, initial validation and moderation can begin during the upload stage. That means a file can be blocked for policy or setup reasons before it ever goes on sale.
How can I reduce wasted Robux when I create Roblox clothes?
Use a draft workflow before final upload. Check your template size, hide guide layers, preview the wrap, confirm your account requirements, and only then pay the upload fee.
Final checks that save the most time in the roblox clothing editor
Most Roblox clothing upload problems usually come from the same repeated mistakes: choosing the wrong item type, using the wrong template size, exporting the file poorly, or missing account rules. Sometimes it’s even a moderation issue that a creator mistakes for a bug, and that happens pretty often.
The good news is that these issues are usually fairly simple to fix. Start with official Roblox clothing templates, and keep classic files at 585x559. It also helps to be clear about whether the project is classic 2D clothing or a 3D avatar item. Before uploading, preview everything and watch fees, file versions, and the extra upload checks Roblox applies now, since many older guides describe a process that may be out of date.
If only a few points from this article stick, these are the ones that matter most here:
- Start with the correct template every time
- Never resize classic clothing files carelessly
- Check validation and moderation early, along with account rules
- Build a repeatable pre-upload checklist
- Treat clothing like a real game asset pipeline by checking files, versions, and upload steps the same way each time
That’s usually the fastest way to create Roblox clothes with less stress and better results. A careful Roblox clothing editor workflow also helps beyond a single shirt upload. It often makes future designs easier too. Whether the goal is roleplay uniforms, themed packs, or one standout item for a creator audience that is growing, these checks will save time in most cases.